
Main > Settings > Invoice Settings
< All Topics
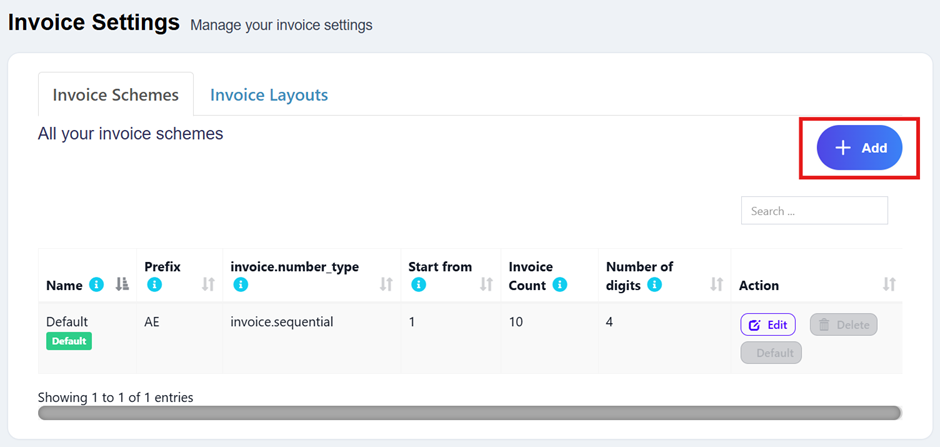
Invoice settings #
To configure go to Settings -> Invoice settings
- Click on Add and select a scheme format.
The format can be XXXX or <year>-XXXX - You can also provide a custom prefix, invoice start number, and number of digits in the invoice number.
- The preview box will display the preview according to the chosen option.
- You will need to set a default invoice scheme for a business to use it.
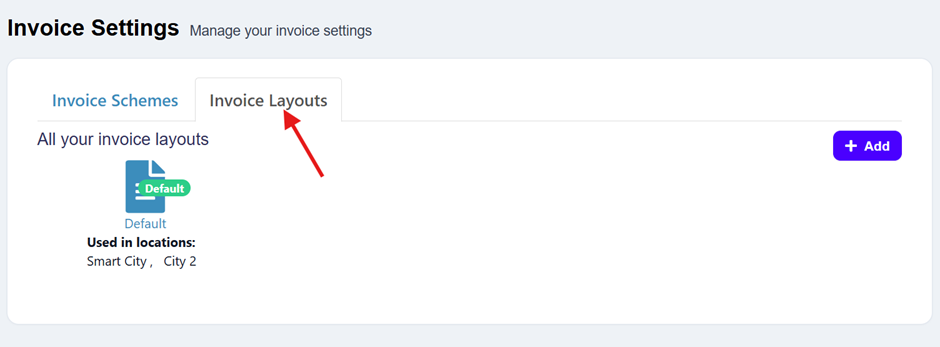
Invoice Layouts #
Invoice Layout helps you to create different invoice formats.
To add a new invoice layout:
Go to Settings->Invoice Settings->Invoice Layout->Add
- Give a unique distinguishable Layout name
- Add the text to be shown in the top/header of the invoice. Generally, it can be your shop name, aligned center with Heading 1 format.
- Add other relevant details.
- You can show/hide address fields.
- You can mark a layout as default. The default layout is used when no layout is found for a location.
- Click on Save.
To use an invoice layout in a location, go to” Business Locations -> Edit” and assign the invoice layout.
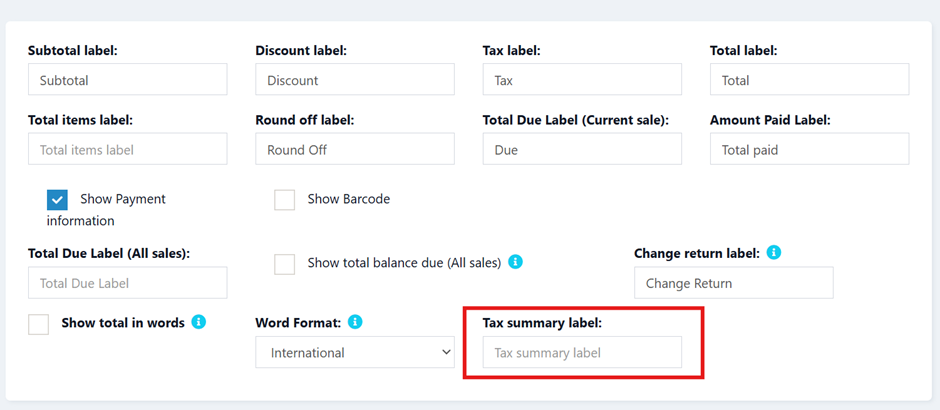
Tax Summary: #
To see the tax summary in invoice, go to add/edit invoice layout, and enter the “Tax Summary Label” option and it will show the tax summary in the invoice.
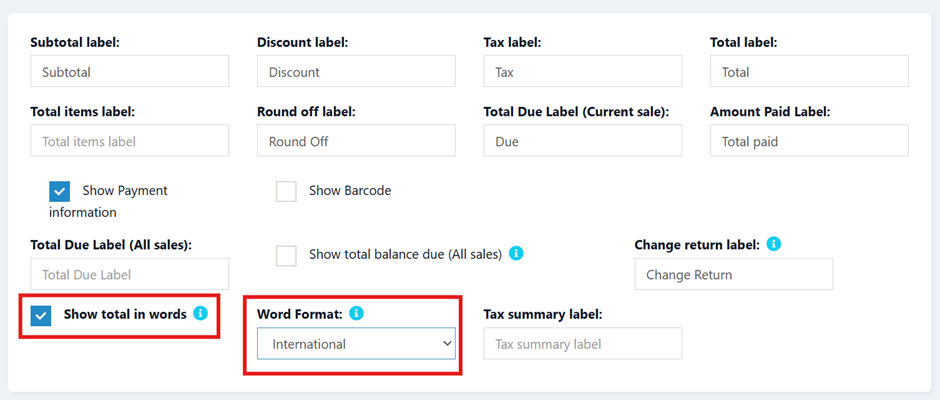
Total in words: #
To display total in words in the invoice Enable:
- Show the total in words
- Choose “Word Format”
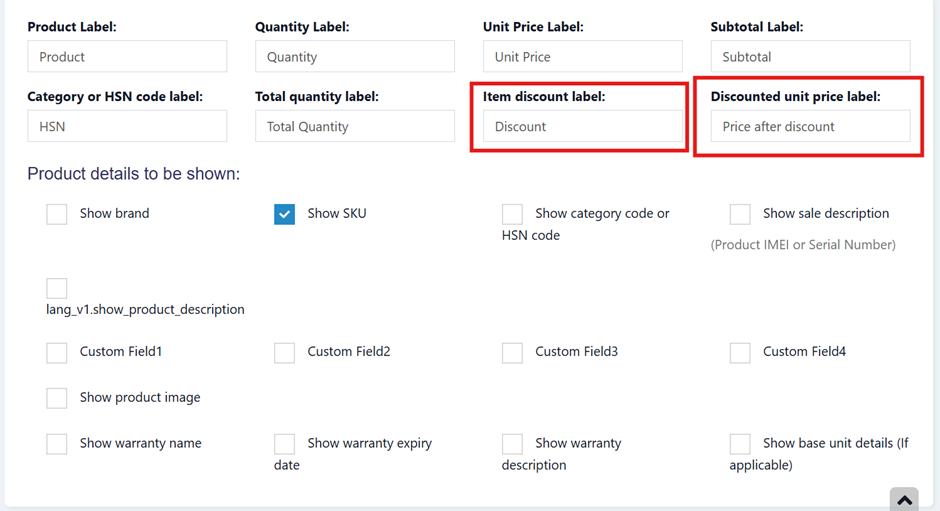
Discounted Price: #
To display the discounted unit price and discount amount in the invoice, enable the following filed in the invoice layout
- Discounted unit price label
- Item Discount label
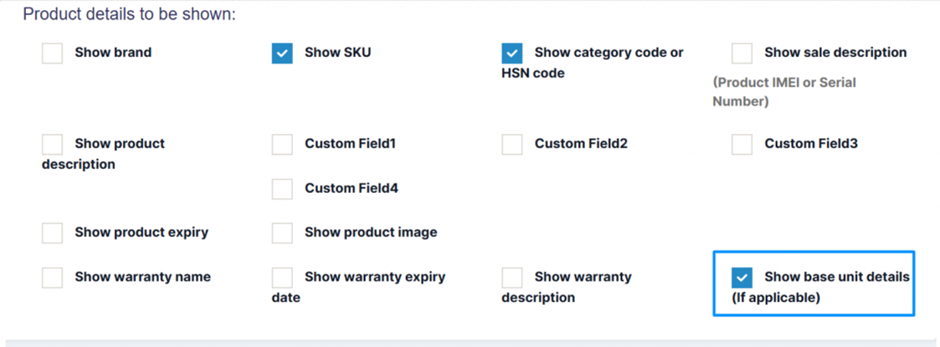
Display unit breakdown: #
To display the reduction summary of quantity from multiple units, enable the check box ‘show base unit details (If applicable)’.
Display Base and Multiple Unit details: #
If you have added multiple units in your system, you can display the relation of the base and multiple units in the invoice.
For example, if 1 dozen = 12 pieces. Then you can display it in the invoice with the price.
To achieve this, follow the steps given below
Step 1: Go to Settings > Invoice Settings > Invoice Layout.
Step 2: Enable the ‘Show base unit details’ checkbox.
Now, if you select a multiple unit the details will be displayed in the invoice.
Adding sale custom fields in the invoice: #
The sale custom fields can be added to the printed invoice.
Step 1: To achieve it, Go to Settings > Invoice Settings > Invoice Layout.
Step 2: Select the invoice layout in which you need the sale custom fields to be printed.
Step 3: Enable the checkboxes for the sell custom fields, “sell 1”, “sell2” etc, and save it.
Now, when you use this chosen invoice layout, the custom fields you set up for sales will automatically appear on the printed invoice.
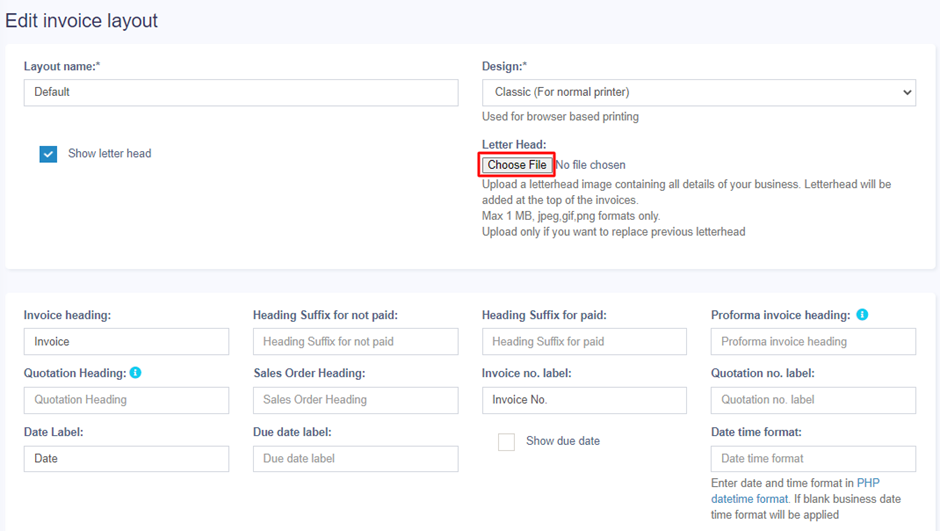
Letterhead: #
A letterhead image containing all details of your business(organization name, address, business registration & other details) can be added to invoices.
The letterhead will be displayed at the top portion of the invoices.
- Go to Settings > Invoice Settings > Invoice Layout.
- Enable the “show letterhead” checkbox.
- Upload the letterhead file (Max 1 MB)
Editing invoice layout HTML/CSS/Javascript
To manually change the code for invoice layout the path is: resources/views/sale_pos/receipts/{design_name}.blade.php Where design_name = name of the design you want to change like classic/elegant/detailed/slim etc.


