
Main > User Management > User & Role Management
< All Topics
Adding a New User in the ERP System
Adding a new user to the ERP system involves filling out specific details to define their role, permissions, and personal information. Follow these steps to create a new user:
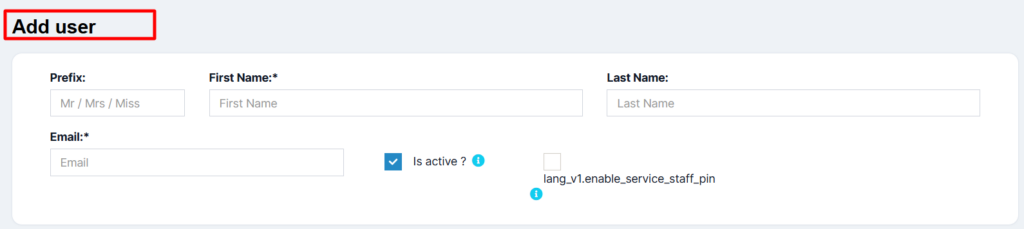
Step 1: Personal Information
- Prefix: Select the appropriate prefix (e.g., Mr., Mrs., Miss).
- First Name: Enter the user’s first name (required).
- Last Name: Enter the user’s last name (optional).
- Email: Provide a valid email address (required).
- Is Active? Ensure this option is enabled to activate the user account.
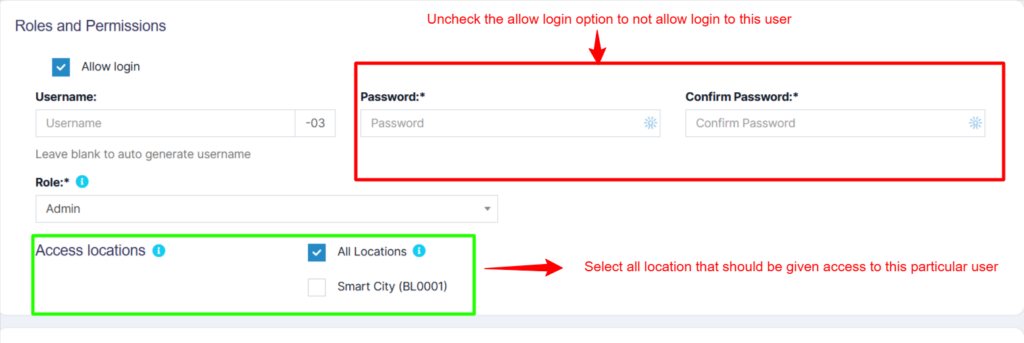
Step 2: Login Credentials
- Allow Login: Check this option to enable the user to log in.
- Username: Enter a unique username or leave it blank to auto-generate one.
- Password: Create a secure password (required).
- Confirm Password: Re-enter the password for confirmation.
Step 3: Roles and Permissions
- Role: Assign a role to the user (e.g., Admin, Manager, Staff).
- Access Locations: Select All Locations for unrestricted access.
- Choose specific locations (e.g., Smart City – BL0001) for limited access.
- Sales Permissions: Sales Commission Percentage (%): Enter the commission percentage for sales.
- Max Sales Discount Percent: Set the maximum discount percentage the user can offer.
- Allow Selected Contacts: Enable this if the user is restricted to specific contacts.
Step 4: Additional Information
- Personal Details
Step 5: Identification and Address
- Guardian Name: Enter the name of the user’s guardian if applicable.
- ID Proof: Provide the name and number of the user’s ID proof.
- Address Details
- Permanent Address: Add the user’s permanent address.
- Current Address: Enter the user’s current address.
Step 6: Bank Details
- Account Holder’s Name: Provide the name on the user’s bank account.
- Account Number: Enter the bank account number.
- Bank Name: Specify the bank’s name.
- Bank Identifier Code: Add the bank’s unique identifier code (e.g., SWIFT/BIC).
- Branch: Mention the branch name.
- Taxpayer ID: Enter the user’s tax identification number.
Step 7: HRM Details
- Department: Specify the department the user belongs to.
- Designation: Mention the user’s job title.
- Step 8: Payroll Information
- Primary Work Location: Select the user’s primary workplace.
- Basic Salary: Enter the user’s monthly salary.
- Pay Components: Add additional pay components (e.g., bonuses, allowances).
Finalizing the Process
Review all the entered details for accuracy.
Click “Save” to create the user.
The user will now appear in the User Management section, where further edits or role adjustments can be made.


